Fire doors are one of the most effective safety measures you can introduce into a home or workplace. Unlike standard doors, they are specially engineered to hold back flames and smoke, buying occupants valuable time to escape during an emergency. Whether you choose an FD30 or FD60 fire door, the integrity of the design ensures that lives are protected and property damage is limited.
The brilliance of fire doors lies not only in their protective qualities but also in their versatility. They can be designed to complement traditional, modern, or industrial interiors, offering style that stands alongside safety. From elegant timber finishes to sleek, glazed panels, there are options to suit both residential properties and commercial spaces, such as offices, shops and apartment blocks.
For homeowners, fire doors provide peace of mind and compliance with building regulations. For business owners, they are a legal necessity in many circumstances, ensuring that escape routes remain safe and that company premises are protected from catastrophic loss. In both cases, they are a great investment in security, safety and reassurance.
However, fire doors only work as intended and when installed correctly. Poor installation can undermine all the engineering that goes into these doors, leaving gaps for fire and smoke to spread. A badly fitted fire door might also stick, rattle, leave uneven gaps around the frame, or simply fail to close properly. These faults may seem minor but in a fire they could cost lives, lead to serious property damage, and even result in non-compliance with UK fire safety legislation.
Every fire door starts with the right certification. Look for a permanent label or plug - usually on the top or hanging edge of the door - that shows the door has been tested and rated (FD30 or FD60). The door leaf, frame, intumescent seals, glazing, hinges and closers must all be supplied as part of a tested and certified doorset or within the scope of an approved test report.
The frame is as important as the door leaf itself. A fire door cannot perform correctly if it is installed in an unsuitable frame. The frame must be made of fire-rated material and fixed firmly into the wall opening. Even the most advanced fire door will fail in an emergency if its frame is not properly specified, as the frame is what ensures the door remains securely in place and maintains its fire resistance when exposed to intense heat and pressure.
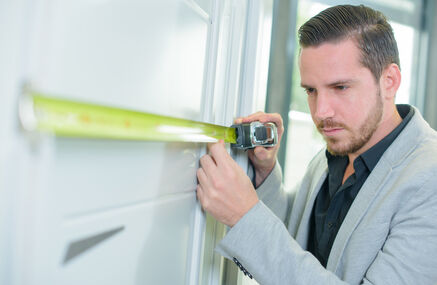
Accuracy is everything with fire door installation. The clearances between the door and the frame are tightly controlled to ensure the seals can work effectively. Even a few millimetres of error can compromise the integrity of the door, allowing smoke or flames to pass through gaps that should remain sealed in an emergency.
Hinges are critical because they carry the weight of the door and keep it in place under extreme conditions. Only fire-rated hinges should be used, and they must be fixed securely with the correct number of screws, as any weakness here could cause the door to distort or even fail during a fire.
Intumescent seals are one of the hidden heroes of a fire door. When exposed to heat, they expand to seal the gap between the door and frame, slowing the passage of smoke and flames. These seals must be installed continuously and without damage, as even the smallest break in their coverage can create a dangerous pathway for smoke and toxic gases to spread.
A fire door is only effective when closed. Door closers make sure the door returns to the shut position automatically every time it’s opened. Choosing the right closer and adjusting it correctly is vital, as a door that slams too hard or fails to latch securely can both compromise safety and reduce everyday usability.
Every piece of hardware must be compatible with the fire door’s certification. Badly chosen or poorly fitting locks and handles can compromise the door’s fire resistance capabilities. All hardware should be fire-rated, installed in line with the manufacturer’s guidance, and never modified, as even small alterations can weaken the door’s ability to perform in a fire.
Once fitting is complete, the fire door should be checked carefully before being signed off. To remain effective, it must then be inspected at regular intervals to confirm it still meets fire safety standards. Ongoing maintenance is crucial, as even minor wear to hinges, seals, or closers can gradually weaken the door’s ability to perform in an emergency.
Fire doors are life-saving assets, but they are only as good as the way they are installed. Every step - from checking certifications to adjusting closers - plays a vital role in ensuring that an FD30 door or FD60 door does its job in an emergency. Cutting corners, leaving gaps, or using uncertified hardware can all lead to potentially catastrophic consequences.
By following best practice and avoiding common mistakes, homeowners and business owners can ensure their fire doors remain both fully compliant and effective, providing peace of mind and fire protection when it matters most.