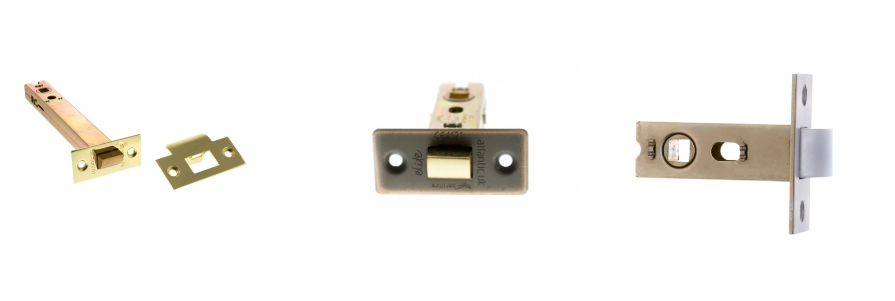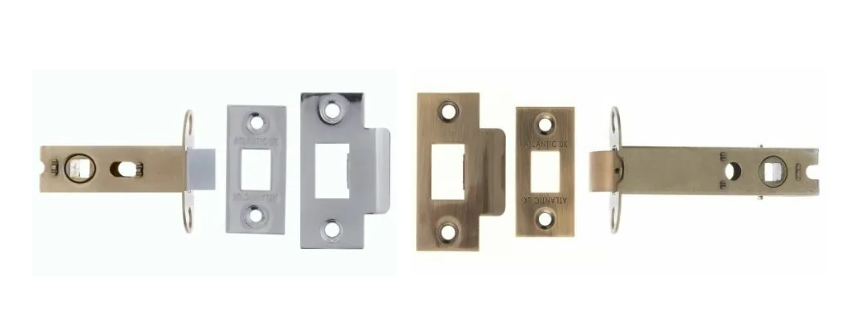
Fitting a tubular latch correctly is one of the most important steps when installing or replacing internal door handles. Although tubular latches are relatively small components, they play a major role in how smoothly a door opens, closes and operates on a daily basis. A poorly fitted latch can cause sticking handles, loose movement, noisy closing and long-term damage to both the door and hardware. Taking the time to install a latch properly helps ensure reliable performance and a professional finish.
Tubular latches are commonly used with lever handles, door knobs and bathroom locks on internal doors throughout modern homes. Available in various sizes and finishes, they are designed to work with a wide range of door hardware styles and door thicknesses. Whether you are upgrading tired handles, installing new internal doors or carrying out a home renovation project, understanding how to fit a tubular latch correctly can save time, reduce frustration and improve the overall functionality, finish, and day-to-day operation of your doors.
Many homeowners underestimate how important latch quality and positioning are when fitting door furniture. Choosing the wrong latch size or incorrectly aligning the spindle and strike plate can quickly lead to operational problems. Cheap or poorly installed latches often create excessive movement in the handle, uneven closing or rattling doors that become increasingly bothersome over time.
Fortunately, fitting a tubular latch is a relatively straightforward DIY task when approached carefully and methodically. With the correct measurements, suitable tools and a little patience, Door Giant can help you achieve a secure and long-lasting installation that improves both the appearance and functionality of your internal doors.
Before fitting a tubular latch, it is essential to select the correct size for your door and handle type. Tubular latches are typically available in different backset sizes, with 64mm and 76mm (2.5" and 3") being the most common options for internal doors. The backset measurement refers to the distance between the edge of the door and the centre of the spindle hole where the handle fits.
Choosing the right size affects both appearance and functionality. A latch that is too small can position handles too close to the edge of the door, while a larger latch often provides a more balanced and comfortable handle placement. Door thickness, handle design and overall proportions should all be considered before purchasing your latch.
Accurate marking out is one of the most important parts of fitting a tubular latch properly. Even small alignment errors can affect how smoothly the door operates and how neatly the hardware sits once installed. Taking time during this stage helps avoid costly mistakes and unnecessary adjustments later.
The latch should usually be positioned around one metre from the floor, aligning consistently with other doors throughout the property for visual continuity. Once the height is established, carefully mark the centre point on both the edge and face of the door before drilling. Double-check all measurements before proceeding to ensure proper alignment between the latch body, spindle hole and strike plate.
Drilling accurately is essential for ensuring the latch operates smoothly and sits flush within the door edge. The larger hole for the latch body is typically drilled into the edge of the door using a spade bit or flat wood bit, while the spindle hole is drilled through the face of the door using an appropriately sized drill bit.
Care should be taken to keep all drilling level and centred. Crooked or oversized holes can lead to loose hardware, stiff handle movement or visible gaps around the latch faceplate. Working slowly and steadily usually produces the cleanest results, particularly on veneered or pre-finished internal doors where surface damage can be more noticeable.
Practical tips:
For a professional-looking installation, the latch faceplate should sit neatly flush against the edge of the door. This requires carefully chiselling a shallow recess around the faceplate outline after marking its position. A flush fit improves appearance while also helping the door close correctly against the frame.
Poorly recessed faceplates can cause the latch to bind or prevent the door from closing fully. Taking time to create a clean recess ensures smoother operation and a more polished final result. Sharp chisels and careful cutting usually produce the best finish, especially on painted or hardwood doors.
The strike plate fitted to the door frame is just as important as the latch itself. If the strike plate is poorly aligned, the door may rattle, fail to close smoothly or require excessive force to latch properly. Correct alignment ensures smooth operation and helps reduce wear on both the latch and handles over time.
After fitting the latch and handles, gently close the door to identify exactly where the latch bolt meets the frame. This allows you to accurately position the strike plate before cutting the recess and securing it into place. Minor adjustments during this stage can make a significant difference to the finished result.
Many common latch problems are caused by rushed installation or incorrect component selection rather than faulty hardware itself. Misaligned spindle holes, poorly recessed faceplates and low-quality latches are all frequent causes of sticking handles and unreliable operation.
Another common issue is choosing lightweight latches for heavy doors or frequently used rooms. Investing in better-quality heavy-duty tubular latches usually results in smoother handle movement, quieter closing and improved long-term durability. A properly installed latch should feel secure, smooth and consistent every time the handle is operated.
At Door Giant, we offer a wide range of high-quality tubular latches designed to suit everything from modern internal doors to traditional home renovations. Our collection includes durable standard tubular latches, heavy-duty latches, fire-rated options and bolt-through tubular latches available in a variety of sizes and a multitude of stunning finishes to complement your chosen door hardware perfectly.
Whether you are replacing worn components, fitting new internal doors or upgrading your existing door furniture, our range is carefully selected to provide reliable performance, smooth operation and long-lasting durability. Alongside tubular latches, we also supply matching door handles, hinges, locks and architectural hardware to help you achieve a professional and cohesive finish throughout your home.